


xsukax VCF Contacts Manager
Build Your Own Privacy-First Contact Manager with VCF Files
Managing your contacts shouldn’t mean surrendering your privacy to cloud services. In this tutorial, you’ll learn how to create and use a powerful, browser-based VCF contact manager that processes everything locally on your device. Whether you’re migrating between phones, backing up important contacts, or simply want complete control over your personal data, this tool gives you the freedom to manage your contact information without third-party servers. Best of all, it’s a single HTML file that works entirely offline – no installations, no accounts, no data leaving your computer.
Prerequisites: A modern web browser (Chrome, Firefox, Safari, or Edge), a VCF contact file to work with (you can export one from your phone or email client), and about 15-20 minutes to complete this tutorial.
Understanding VCF Files and Local Data Processing
Before diving into the implementation, it’s important to understand what we’re working with and why this approach matters for your privacy and data portability.
1- Learn what VCF (vCard) files actually are and why they’re the universal standard for contact exchange.
VCF stands for Virtual Contact File, and it’s based on the vCard standard that’s been around since the 1990s. Think of it as the “MP3 of contact information” – a universal format that works across virtually every device and platform. When you export contacts from your iPhone, Android device, Gmail, Outlook, or any other contact management system, you’ll typically get a .vcf file. This format stores all your contact details (names, phone numbers, emails, addresses, organizations, birthdays, notes, and more) in a standardized text format that any system can read and import.
The beauty of VCF files is their portability – they’re not locked to any specific company or service. You can move contacts between completely different ecosystems without losing data or paying for migration services. This is exactly why we’re building a tool to work with them directly.
2- Understand why local, browser-based processing protects your privacy better than cloud services.
When you upload your contacts to a web service for editing or conversion, you’re trusting that company with deeply personal information – phone numbers, email addresses, physical locations, and relationship details. Many “free” online tools monetize by harvesting this data or serving targeted advertisements based on your contact list.
Our approach is different: everything happens in your browser using JavaScript. The VCF file never leaves your device. There’s no server receiving your data, no database storing your contacts, and no third party analyzing who you know. This is called “client-side processing,” and it’s the gold standard for privacy-sensitive operations. When you close the browser tab, the data is gone unless you explicitly save it.
This local processing model also means the tool works completely offline. You could disconnect from the internet right now and still use it. No monthly subscriptions, no “premium features,” no artificial limitations – just a tool that does one job well.
3- Download the VCF Contacts Manager HTML file from the GitHub repository.
Navigate to https://github.com/xsukax/xsukax-VCF-Contacts-Manager and click the green “Code” button, then select “Download ZIP” to get the entire repository, or click on “index.html” and then click the “Raw” button to view just the HTML file, which you can save using your browser’s “Save Page As” function (usually Ctrl+S or Cmd+S).
Save the file to a location you’ll remember – I recommend creating a dedicated folder like “Documents/ContactTools” or “Desktop/VCF-Manager”. The file is completely self-contained at around 20KB, meaning it includes all the HTML, CSS styling, and JavaScript code in a single file with zero external dependencies. This makes it portable, easy to backup, and impossible to break by moving it between folders or devices.
4- Open the VCF Contacts Manager in your web browser by double-clicking the HTML file.
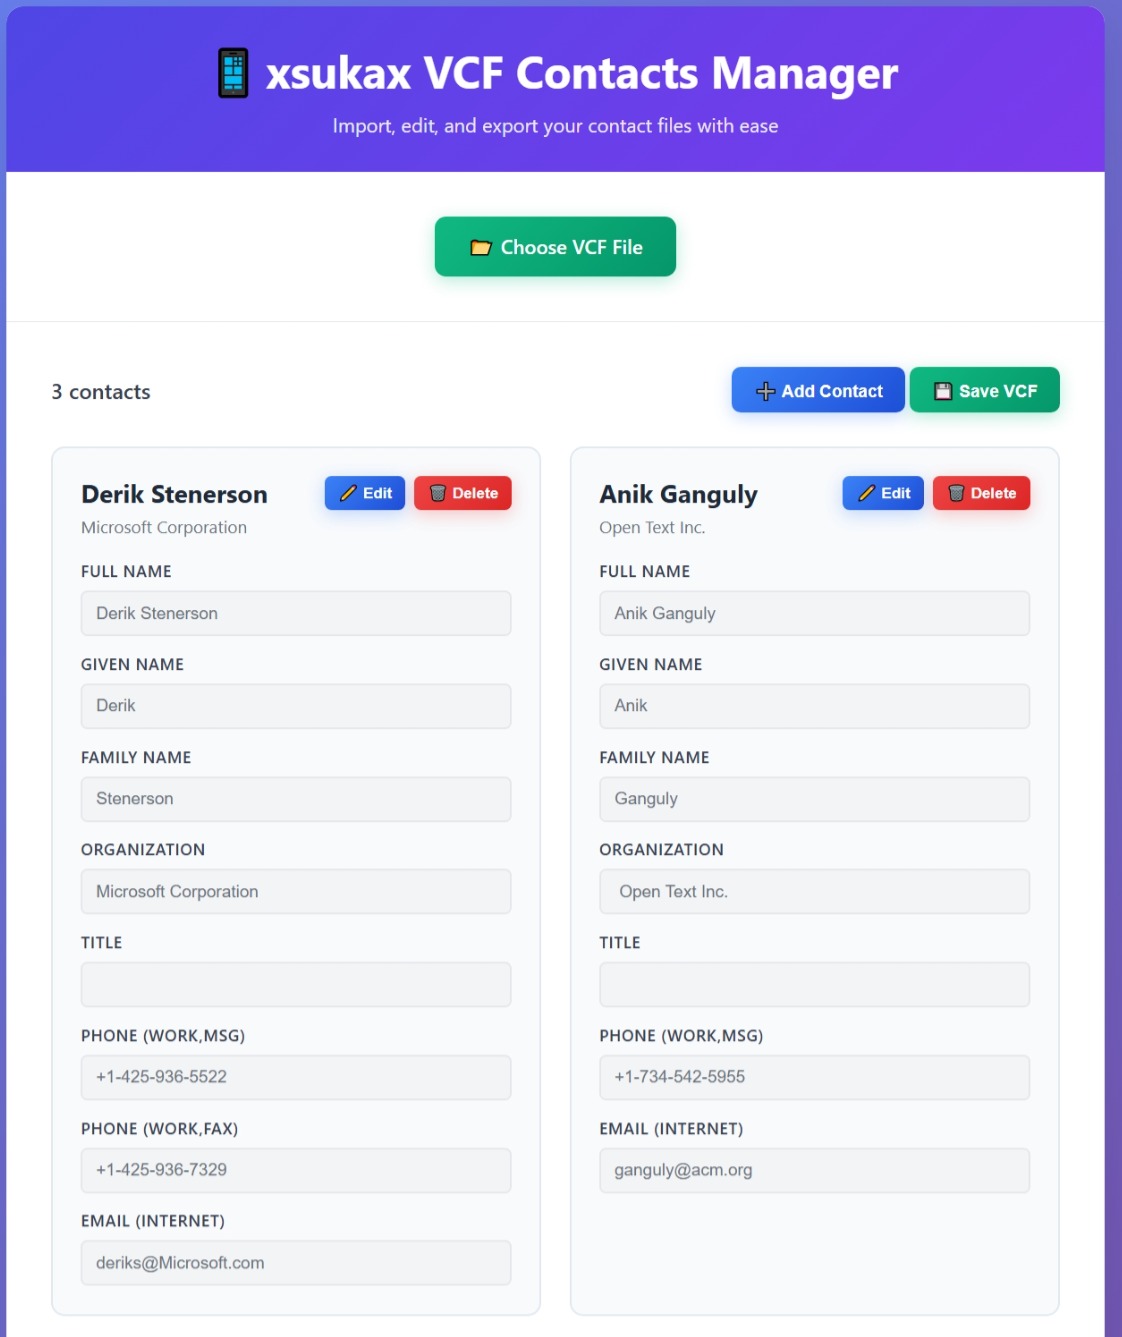
Simply double-click the “index.html” file and it will open in your default web browser. You should see a beautifully designed interface with a purple gradient header displaying “📱 xsukax VCF Contacts Manager” and a prominent green “📂 Choose VCF File” button in the center. The interface is responsive and modern, using gradients and smooth animations that make it feel like a professional application rather than a simple HTML page.
If you prefer a different browser, right-click the file and select “Open With” to choose your preferred browser. The tool works in all modern browsers, though Chrome and Edge tend to handle file downloads most smoothly when you export your edited contacts later.
5- Prepare a VCF file to work with by exporting contacts from your phone or email client.
If you don’t already have a VCF file, you’ll need to create one. On iPhone, go to Settings > [Your Name] > iCloud > Contacts and ensure contacts are syncing, then visit iCloud.com on a computer, sign in, click Contacts, select all contacts (Cmd+A or Ctrl+A), and click the gear icon to “Export vCard”. On Android, open the Contacts app, tap the menu (three lines), choose “Settings” > “Export” > “Export to .vcf file” and select your storage location.
For Gmail contacts, visit contacts.google.com, click “Export” from the left sidebar, choose “vCard format” and “All contacts” (or select specific ones), then click Export. Outlook users can go to People, select contacts, click “Manage” > “Export contacts” and choose the vCard format.
Start with a small file (maybe 5-10 contacts) for this tutorial so you can see changes quickly and understand how everything works. You can always process your complete contact database later once you’re comfortable with the tool.
Importing and Parsing Your Contact Data
Now that you understand the technology and have your files ready, let’s import some contacts and explore how the VCF format gets parsed into editable data.
6- Click the green “📂 Choose VCF File” button and select your prepared VCF file from your computer.
When you click this button, your operating system’s file picker dialog will appear. Navigate to where you saved your VCF export and select it. The button uses HTML’s file input element with accept=".vcf" filter, which means it will preferentially show VCF files (though you can typically change the filter to “All Files” if your VCF file has an unusual extension like .vcard).
The moment you select a file, the JavaScript FileReader API kicks into action. This browser API reads the file contents as text without uploading it anywhere – it’s all happening in your browser’s memory. You’ll see a green success message appear briefly saying “VCF file loaded successfully!” if everything parsed correctly.
7- Observe how the interface transforms from the empty state to showing your contact count and controls.
After successful import, several things happen simultaneously: the “No contacts loaded” message disappears, a contact counter appears in the top left showing “X contacts” (where X is the number of contacts found in your file), and two new buttons appear – “➕ Add Contact” and “💾 Save VCF”. Below these controls, you’ll see a grid of contact cards, each displaying a contact’s information in an organized, professional layout.
This transformation demonstrates good UI/UX design – the interface adapts to show only relevant controls based on the current state. Empty states (like the one you saw initially) help users understand what action to take, while active states focus on the available operations.
8- Understand how the VCF parsing algorithm breaks down your contact file into individual vCard blocks.
Here’s where it gets technically interesting. The VCF file you imported is actually just a text file with a specific structure. Each contact starts with “BEGIN:VCARD” and ends with “END:VCARD”, with all the contact details in between as property:value pairs like “FN:John Smith” (full name) or “TEL;TYPE=CELL:+1234567890” (phone number).
The JavaScript parser splits your file at every “BEGIN:VCARD” marker, creating an array of contact blocks. For each block, it reads line-by-line looking for specific properties: N (structured name), FN (formatted name), ORG (organization), TITLE (job title), TEL (telephone), EMAIL, ADR (address), URL, NOTE, and BDAY (birthday). Each property can have parameters after a semicolon, like “TYPE=HOME” or “TYPE=WORK”, which the parser extracts to categorize the information properly.
This parsing process is forgiving – if a contact is missing certain fields, it simply leaves them empty rather than failing. The only requirement is that a contact must have at least a full name (FN) or a given/family name (N) to be considered valid.
9- Examine a contact card to see how your data is organized and displayed.
Click or scroll to view one of your contact cards. Each card shows the contact’s name prominently at the top (this is the FN field), followed by their organization if available. Below that, you’ll see neatly organized sections for each piece of information: Full Name, Given Name, Family Name, Organization, Title, and then dynamic sections for however many phone numbers, email addresses, and other details this particular contact has.
Notice that some contacts might have multiple phone numbers or email addresses – the VCF format supports this by allowing repeated TEL and EMAIL properties. The parser creates arrays for these fields, and the renderer displays each one in its own labeled input field showing the type (CELL, WORK, HOME, etc.).
The card layout uses CSS Grid for responsive organization – on desktop, you’ll see multiple cards side-by-side, while on mobile they stack vertically. Each card has a subtle hover effect (try moving your mouse over it) that highlights it with a blue border and slight shadow, providing visual feedback that it’s interactive.
10- Learn about the vCard 3.0 specification and why understanding data structure matters.
The tool implements vCard 3.0, which is the most widely supported version of the standard. This version defines exactly how contact data should be structured, ensuring compatibility across different platforms. The VERSION:3.0 line you’ll see in VCF files tells other systems which specification to follow when parsing the data.
Understanding this structure is valuable because it empowers you to troubleshoot issues. If a contact doesn’t import correctly, you can open the VCF file in any text editor and see exactly what data is present and how it’s formatted. You might discover, for example, that a phone number is formatted incorrectly or that a required semicolon is missing from an address field.
This knowledge is also transferable – once you understand vCard structure, you can work with contact data programmatically, write scripts to batch-edit contacts, or even create contacts from scratch using a text editor. You’re not dependent on any specific application’s interface.
Editing and Managing Your Contact Information
With your contacts successfully imported and displayed, let’s explore the editing capabilities that give you precise control over your contact data.
11- Click the “✏️ Edit” button on any contact card to enter edit mode.
Each contact card has an “✏️ Edit” button in the top right corner. When you click it, the card transforms: the background changes to a light green tint (indicating edit mode), all the input fields become active and editable (they change from a disabled gray appearance to white), and the action buttons change to “✓ Save” and “✕ Cancel”.
This visual state change is intentional design – it provides clear feedback that you’re now in a different mode where your changes will be tracked. The green background acts as a constant reminder that unsaved edits are in progress. Only one contact can be in edit mode at a time, which prevents confusion and accidental data loss.
12- Edit any field by clicking into the input box and typing your changes.
Try modifying the “Given Name” field – click into it and you’ll see a cursor appear. Type a new name and watch as the input updates in real-time. Each input field has a subtle blue focus border that appears when selected, making it clear which field you’re currently editing.
The fields are appropriately typed: email fields use type="email" which provides validation, URL fields use type="url", and regular text fields use type="text". This HTML5 input typing provides helpful mobile keyboards (like showing the @ symbol prominently for email fields on phones) and basic validation before saving.
13- Understand the nested data structure by examining how names are stored separately from display names.
Here’s an important concept: the VCF format distinguishes between the structured name (N field: family;given;middle;prefix;suffix) and the formatted full name (FN field). The N field breaks your name into components that can be rearranged for different cultural conventions – some cultures display family name first, others given name first.
The FN field, on the other hand, is the display name that appears in phone lists and contact apps. Many systems automatically generate FN from the N components, but they’re technically separate fields. This is why you see both “Full Name” and “Given Name” / “Family Name” fields – you can customize exactly how the name appears while maintaining the structured components for sorting and cultural adaptation.
When you edit either field, both get updated in the contact object, but they remain independent. This flexibility ensures maximum compatibility – if you import the VCF into a system that only uses FN, it works; if you import into a system that prefers N components, that works too.
14- Explore multi-value fields like phone numbers and emails to see how the vCard standard handles multiple entries.
Scroll down in your editing contact to the phone and email sections. If this contact has multiple phone numbers, you’ll see separate input fields for each one, labeled with their type: “Phone (CELL)”, “Phone (WORK)”, “Phone (HOME)”, etc. The same applies to email addresses.
This demonstrates the vCard standard’s support for arrays – a single contact can have unlimited phone numbers, emails, addresses, and URLs. Each entry stores both the value and a type parameter. When you edit one of these fields, you’re modifying a specific index in the array. The JavaScript uses dot notation like tel.0.value to access the first phone number’s value or email.1.value for the second email address.
This multi-value capability is crucial for real-world contact management. Most people have multiple ways to reach them – mobile, work line, home, a personal email, work email, etc. The vCard format captures all of this richness instead of forcing you to choose just one.
15- Click the green “✓ Save” button to commit your changes to the contact data structure.
When you click Save, the JavaScript iterates through every input field in the card using querySelectorAll('.detail-input'). For each field, it reads the data-field attribute (which contains the path to the property, like “fn” or “tel.0.value”) and the current value you’ve entered. It then uses a clever nested property setter function that can navigate the dot-notation path and update the correct location in the contact object.
After all fields are updated, the contact card exits edit mode and re-renders with your new data. You’ll see a green success message appear briefly: “Contact updated successfully!” The contact remains in the contacts array in memory – nothing is saved to disk yet. That happens when you export the VCF file later.
If you click the “✕ Cancel” button instead, the card simply re-renders from the original data, discarding any changes you made. This is safe editing – you can experiment without fear of permanently corrupting your data until you explicitly save.
Advanced Contact Management and Data Operations
Now that you’re comfortable with basic editing, let’s explore adding new contacts, deleting unwanted ones, and understanding the complete data lifecycle.
16- Click the “➕ Add Contact” button to create a brand new contact from scratch.
The blue “➕ Add Contact” button appears in the top controls section. When clicked, it creates a new contact object with default values: Full Name set to “New Contact”, Given Name “New”, Family Name “Contact”, and empty arrays for phone numbers and emails (though it pre-populates one empty CELL phone entry and one INTERNET email entry as starting points).
This new contact gets assigned a unique ID using Date.now() + Math.random(), which creates a timestamp-based identifier with a random component to ensure uniqueness even if you add multiple contacts within the same millisecond. The contact is inserted at the beginning of the contacts array using unshift(), so it appears as the first card in the grid.
Immediately after creation, the contact enters edit mode automatically – you’ll see it appear at the top with the green editing background and editable fields. This UX decision saves you a click and clearly signals “this is new, you should fill it out.”
17- Fill in all the relevant fields for your new contact, understanding that only the name is truly required.
Start typing in the fields to populate your new contact. The only technical requirement is that the contact must have either a Full Name (FN) or at least a Given Name or Family Name in the N structure. Everything else – organization, title, phone, email, address, URL, notes, birthday – is completely optional.
This flexibility reflects real-world contact management. Sometimes you only know someone’s name from a business card. Other times you have complete details including multiple addresses and phone numbers. The vCard standard accommodates the full spectrum from minimal to comprehensive contact information.
As you type, notice there’s no character limit or strict validation (except on email and URL fields where the browser provides basic format checking). You can enter international phone numbers, add country codes, use extensions – the VCF format stores it all as text, leaving interpretation to whatever system imports the file later.
18- Save your new contact and observe how it persists in the interface alongside your imported contacts.
Click the green “✓ Save” button when you’re done entering information. The new contact card returns to its normal appearance and remains in the grid. If you scroll through your contacts, you’ll see it mixed in with your imported contacts – there’s no visual distinction between “imported” and “newly created” contacts because to the tool, they’re all just contact objects in the same array.
This is an important realization: the source of the data doesn’t matter anymore. Whether you imported 100 contacts from Gmail and added 5 manually, they’re all equal citizens in your contact list. When you export the VCF file, all contacts get written out using the same format, creating a unified file that any system can import.
19- Use the delete functionality to remove unwanted or duplicate contacts from your collection.
Click the “🗑️ Delete” button on any contact card you want to remove. Instead of immediately deleting (which would be dangerous – accidental clicks happen!), a modal dialog appears with a warning icon and the message “Are you sure you want to delete this contact? This action cannot be undone.”
This confirmation modal demonstrates responsible UX design for destructive actions. The modal has two buttons: “Cancel” (gray, secondary style) and “Delete” (red, danger style). The color coding and positioning follow user expectations – destructive actions are red and positioned where users naturally look last (right side), giving them a moment to reconsider. You can also dismiss the modal by clicking outside it or pressing the Escape key.
20- Confirm the deletion and understand that the contact is removed from memory but the original VCF file remains unchanged.
Click the red “Delete” button to proceed with removal. The modal disappears, the contact card vanishes from the grid with a smooth animation, the contact counter updates (reducing by one), and you see a green success message: “Contact deleted successfully!”
Here’s the crucial point: this deletion happens in memory only. The JavaScript removes the contact from the this.contacts array using the filter() method, but your original VCF file on disk remains completely untouched. This gives you a safety net – if you accidentally delete something important, just refresh the browser page and re-import your original file. Nothing is permanently lost until you export and overwrite the original file.
This temporary workspace concept is powerful for experimentation. You can import a contact database, make wild changes, add test contacts, delete things – and if you don’t like the results, just refresh and start over. It’s a playground for contact data with no consequences until you explicitly save.
Exporting Your Work and Understanding Data Workflows
After all your editing is complete, it’s time to export your modified contacts back to VCF format and understand how this tool fits into your broader contact management workflow.
21- Click the “💾 Save VCF” button to generate a downloadable VCF file containing all your contacts.
The green “💾 Save VCF” button in the top controls triggers the export process. When clicked, the JavaScript iterates through every contact in the array and generates proper vCard 3.0 formatted text. For each contact, it writes “BEGIN:VCARD” followed by “VERSION:3.0”, then adds each populated field using the correct property names and formats.
Phone numbers become “TEL;TYPE=CELL:+1234567890” lines, emails become “EMAIL;TYPE=INTERNET:[email protected]“, structured names become “N:Family;Given;Middle;Prefix;Suffix”, and so on. Empty fields are simply omitted – the VCF format doesn’t require placeholder values. Each contact ends with “END:VCARD”, and all contacts are joined with newline characters to create a single, multi-contact VCF file.
This generated text is converted to a Blob object with MIME type “text/vcard;charset=utf-8”, which tells browsers and operating systems how to handle the file. The blob is turned into a downloadable URL and triggered as an automatic download using a programmatically created anchor element.
22- Locate the downloaded “contacts.vcf” file in your browser’s download folder.
The file will appear in your default download location (usually “Downloads” folder) with the name “contacts.vcf”. Your browser may show a download notification in the bottom left or top right – click “Show in folder” or “Open folder” to navigate directly to it. The file size will vary based on how many contacts you have and how detailed they are, but typically ranges from a few kilobytes for simple contacts to hundreds of kilobytes for extensive contact databases.
This downloaded file is now a standalone VCF that you can import into any contact management system. It’s completely independent from the tool – you could email it, upload it to iCloud, import it to your phone, or store it as a backup. The format is universal and the data is yours.
23- Verify your export by re-importing the file into the VCF Contacts Manager or into your phone’s contact app.
For a sanity check, try uploading the newly exported “contacts.vcf” file back into the VCF Contacts Manager using the “📂 Choose VCF File” button. Your contacts should reappear exactly as you left them, with all edits preserved. This round-trip test verifies that the export process correctly formatted everything and that no data was lost or corrupted during the VCF generation.
For the ultimate verification, import the file into your actual phone or email contact system. On iPhone, you can AirDrop the file to yourself or email it and tap to import. On Android, use the Contacts app’s Import function. For Gmail, go to contacts.google.com, click Import, and select your file. If all your edits appear correctly in your real contact app, you’ve successfully completed the full workflow!
24- Develop a workflow for regular contact maintenance using this tool as part of your backup strategy.
Now that you understand the complete process, consider how this tool fits into your digital life. Here’s a recommended workflow: Once a month, export your contacts from your primary system (phone or email) to VCF, use this tool to clean up duplicates and correct errors, re-export the cleaned file, and store it in multiple locations (cloud backup, external drive, encrypted USB stick).
This approach gives you control over your contact data independent of any single company’s ecosystem. If you switch from iPhone to Android, or from Gmail to Outlook, you have a clean, maintained VCF file ready to import. If a device fails or an account gets compromised, your contacts are safely backed up.
You can also use this tool for bulk editing operations that are tedious in phone interfaces – like standardizing how company names are formatted, adding country codes to all phone numbers, or updating everyone’s organization after a company merger. Import, edit efficiently with a keyboard and mouse, export, re-import to your phone – much faster than tap-tap-tapping on a small screen.
25- Understand the privacy implications and advantages of client-side contact management.
Take a moment to appreciate what just happened from a privacy perspective. You processed potentially hundreds of contacts – names, phone numbers, emails, addresses – without creating an account, without accepting terms of service, without granting any company access to this deeply personal information. No server logged your contact list, no algorithm analyzed your social network, no advertiser built a profile of who you know.
This is the power of client-side web applications. The HTML file is just code – it’s instructions for your browser to follow. All the processing happens in your browser’s sandbox, isolated from the network. Even if someone intercepted your network traffic while using this tool, they’d see nothing but the initial HTML file download. Your actual contact data never crosses the network boundary.
This model should become your preference for sensitive data operations. When possible, choose tools that run locally over cloud services. Your privacy is worth the extra step of downloading a tool instead of using a web service.
Congratulations and Next Steps
You’ve successfully learned how to manage VCF contact files using a privacy-first, browser-based tool! You now understand the vCard standard, how contact data is structured and parsed, the difference between client-side and server-side processing, and how to maintain control over your personal contact information.
This knowledge extends beyond just this specific tool. You understand VCF file structure well enough to edit them manually in a text editor if needed. You appreciate the importance of data portability and format standards. You’ve experienced the power of HTML/JavaScript applications that run entirely in your browser without external dependencies.
For further exploration, consider examining the tool’s source code more deeply – it’s all in that one HTML file. Study how the CSS creates the responsive grid layout, how the JavaScript parser handles edge cases in malformed VCF data, or how the modal confirmation system prevents accidental deletions. You might even customize it: change the color scheme, add new fields specific to your needs, or extend it to handle vCard 4.0 features.
You could also explore related tools in the xsukax ecosystem for privacy-focused data management – there are similar single-file applications for CSV processing, file encryption, and other data operations that respect your privacy by keeping everything local.
Remember: your data is yours. Tools should serve you, not harvest you. This VCF Contacts Manager is a small example of what’s possible when we prioritize user control and privacy over centralized convenience. Keep this philosophy in mind as you choose tools for managing other aspects of your digital life.
If you have questions or run into issues with specific VCF files, feel free to explore the GitHub repository at https://github.com/xsukax/xsukax-VCF-Contacts-Manager where you can review the code, report bugs, or contribute improvements. Happy contact managing! 😀